There's a quiet moment of magic the first time an automation runs without you. You close your laptop, go to sleep, and at 7 a.m. your workflow wakes up on its own, fetches the data, does the work, and drops the result in your inbox. You did nothing. It just… happened.
New to n8n? Start with the complete beginner's guide — every concept explained once, with the whiteboard diagrams, then come back here.
That moment is powered by one small node: the Schedule Trigger. It's the difference between a workflow you run and a system that runs itself. If you've been clicking "Execute" to test your n8n builds, this is the upgrade that makes them real — and on free, self-hosted n8n, it costs nothing to run as often as you like.
Let's set one up properly.
What the Schedule Trigger does
Most workflows start with a Manual Trigger — you press a button. The Schedule Trigger replaces that button with a clock. Instead of "start when I click," it says "start every X." Every 5 minutes. Every day at 9 a.m. Every Monday. Every hour on the hour. You define the rhythm once, and n8n handles the rest forever.
It sits at the very front of your workflow, exactly where the Manual Trigger used to be. Everything after it — fetching data, calling an AI, sending a message — stays the same. You're only changing what starts it.
Why this needs self-hosted n8n running
Here's the one honest catch: a scheduled workflow only fires while your n8n is actually running. On self-hosted n8n on your laptop, that means the schedule pauses when the machine is off or asleep. For learning and testing that's fine. When you want a schedule to run 24/7 — say, a 7 a.m. daily report that must always go out — you move the same setup to a cheap always-on server or a Raspberry Pi, and the identical workflow runs around the clock.
Either way, on the free self-hosted edition there's no limit on how often your schedules fire. Every minute, all day, forever — no per-execution bill.
Step 1: Add the Schedule Trigger
Start a new workflow and add a Schedule Trigger as the first node. Inside, you set the interval — this is the rhythm:
- Seconds / Minutes / Hours — "every N minutes," great for frequent checks (price monitors, alerts).
- Days — "every day at a specific time," the classic morning-report pattern.
- Weeks — "every Monday at 9 a.m.," for weekly digests.
- Cron — for precise or complex timing, a single cron expression gives you full control.
Start simple: set it to every few minutes so you can watch it work, then dial it back to something realistic later.
Step 2: Build the rest of the workflow
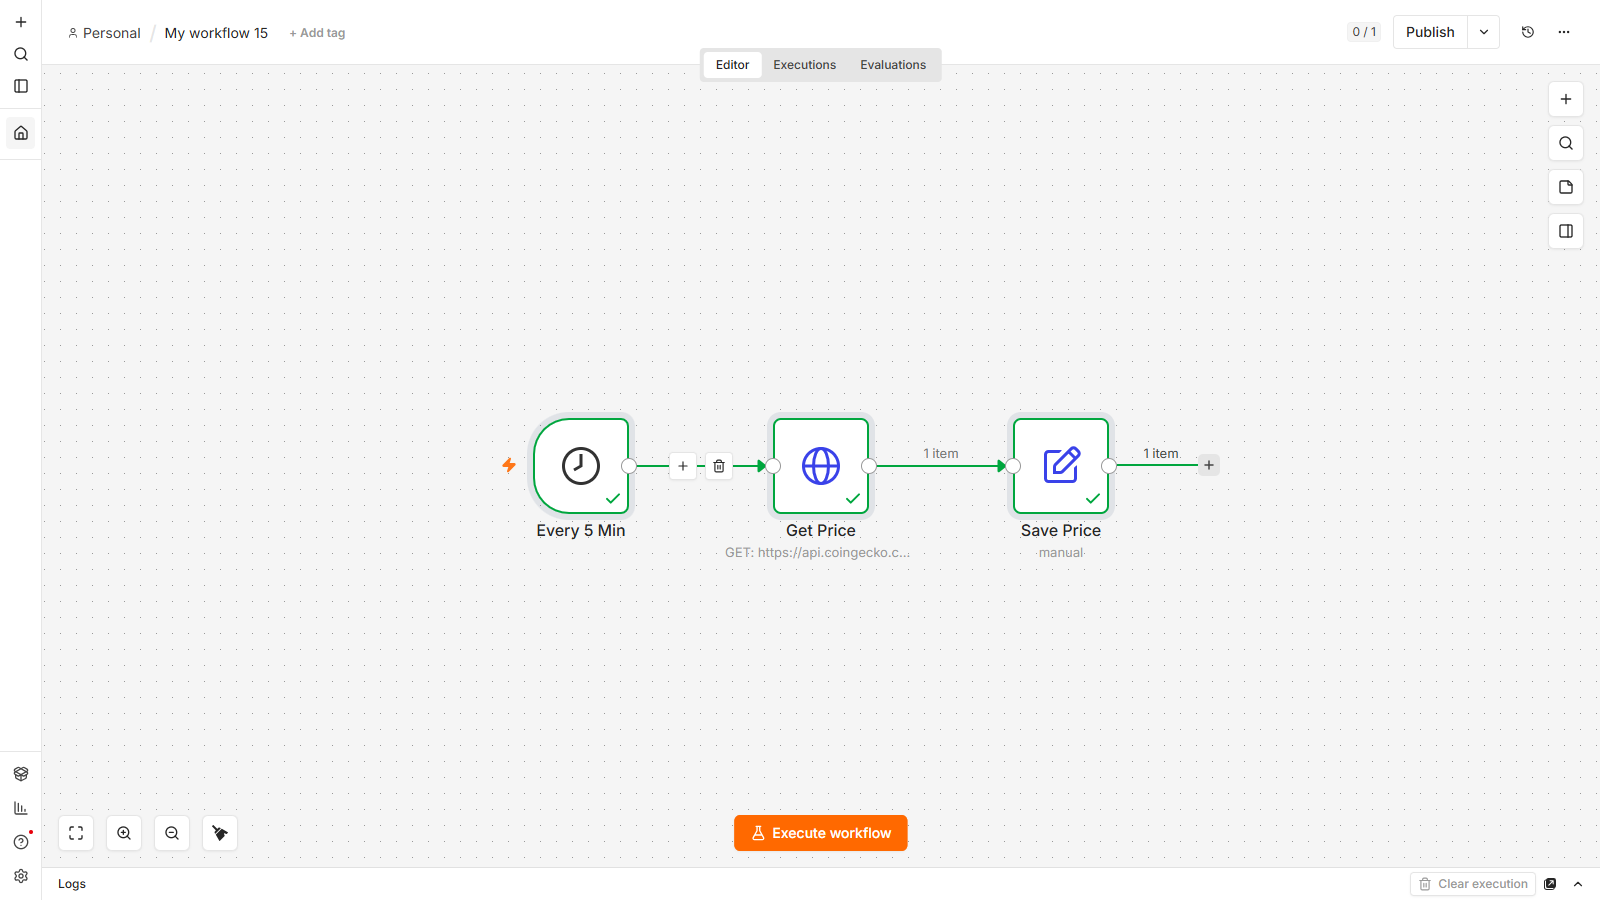
After the trigger, add whatever the automation should do. A common, satisfying first build: Schedule Trigger → HTTP Request → Edit Fields — on a timer, fetch some live data (a price, the weather, a feed) and tidy it up. From there you'd normally send it somewhere: an email, a Slack message, a Google Sheet.
The beauty is that the trigger doesn't care what comes after it. Whatever workflow you've already built, you can put it on a schedule just by swapping its first node.
Step 3: Test it, then activate it
While building, click Execute workflow to run it once on demand — this is how you check the whole chain works without waiting for the next scheduled time. When you're happy, save and activate the workflow using the toggle at the top. From that moment, n8n runs it on the schedule you set, automatically, in the background — no browser, no clicking, no you.
That's the line between a demo and a real system.
Ideas to put on a schedule
- Daily brief — every morning, gather news/prices/metrics, have a local AI summarize them, email you the digest.
- Price or stock watch — every few minutes, check a value and alert you only when it crosses a threshold.
- Weekly report — every Monday, pull last week's numbers and post them to your team.
- Housekeeping — nightly cleanup, backups, or syncs between apps.
Same Schedule Trigger, different payload. Once you've got the rhythm node, everything you've built can run on autopilot.
FAQ
What is the Schedule Trigger in n8n?
It's a trigger node that starts a workflow automatically on a time-based schedule — every few minutes, daily at a set time, weekly, or on a custom cron expression. It replaces the Manual Trigger so the workflow runs on its own instead of when you click.
Does a scheduled n8n workflow run when my computer is off?
No. A self-hosted workflow only fires while n8n is actually running, so schedules pause when your machine is off or asleep. For always-on scheduling, run the same n8n setup on an inexpensive always-on server; the workflow itself doesn't change.
How do I run an n8n workflow every day at a specific time?
Add a Schedule Trigger, set the interval field to Days, and choose the time (for example 9:00). Save and activate the workflow, and n8n will run it once every day at that time.
Do I have to activate the workflow for the schedule to work?
Yes. While building you can click "Execute workflow" to test on demand, but the schedule only runs automatically once you save and activate the workflow with the toggle at the top. An inactive workflow won't fire on its own.
Is there a limit on how often schedules run in free n8n?
No. On the free self-hosted edition there's no cap on executions, so your schedules can run as frequently as you set them with no per-run cost.
Built and tested on free self-hosted n8n by lalittaparia.online — the no-code AI automation systems I actually use, step by step. Subscribe for the builds that turn a schedule into a money-making system.


